728x90
개요
String 변수가 null이나 undefined인지 확인하는 기능은 쓰임새가 많다. Java라면 그런 목적으로 Apache commons의 StringUtils를 많이 사용하고, String 관련 메서드를 사용할 때 null 체크를 생략시켜줘서 편리하다. JavaScript에서도 클래스 및 메서드 명칭이 동일하고 동작구조도 최대한 동일하면 협업 시 팀원들이 빠르게 기능을 이해하고 사용할 수 있을 거란 생각이 들었다.
샘플코드
Apache commons의 StringUtils의 메서드를 모두 구현하려면 시간이 많이 들어서 당장 자주 쓸 기능만 작성했다. 나머지는 필요해질 때마다 추가 작성하면 된다.
[2023-03-28] isEmpty, isNotEmpty, isNotBlank 추가.
<StringUtils.js>
/**
* Apache commons의 StringUtils 클래스의 편리한 기능을 자바스크립트에서 그대로 사용하기 위한 객체.
*/
const StringUtils = {};
/**
*
* @param str {String} 확인할 문자열
* @return 문자열 길이. 문자열이 없으면 0.
*/
StringUtils.length = function(str) {
if (str) {
return str.length;
}
return 0;
};
/**
* <p>Checks if a String is empty ("") or null or undefined.</p>
*
* <pre>
* StringUtils.isEmpty(undefined) = true
* StringUtils.isEmpty(null) = true
* StringUtils.isEmpty("") = true
* StringUtils.isEmpty(" ") = false
* StringUtils.isEmpty("bob") = false
* StringUtils.isEmpty(" bob ") = false
* </pre>
*
* @param cs {String} 확인할 문자열
* @return {boolean} <code>true</code> if the cs is empty or null or undefined.
*/
StringUtils.isEmpty = function(cs) {
if (cs == undefined || cs == null) {
return true;
}
if (!("string" === typeof(cs) || cs instanceof String)) {
throw new TypeError("Argument cs must be type of String.");
}
return cs.length == 0;
};
/**
* <p>Checks if a String is not empty ("") and not null and not undefined.</p>
*
* <pre>
* StringUtils.isNotEmpty(undefined) = false
* StringUtils.isNotEmpty(null) = false
* StringUtils.isNotEmpty("") = false
* StringUtils.isNotEmpty(" ") = true
* StringUtils.isNotEmpty("bob") = true
* StringUtils.isNotEmpty(" bob ") = true
* </pre>
*
* @param cs {String} 확인할 문자열
* @return {boolean} <code>true</code> if the cs is not empty and not null and not undefined.
*/
StringUtils.isNotEmpty = function(cs) {
return !StringUtils.isEmpty(cs);
};
/**
* <p>Checks if a CharSequence is empty (""), null or whitespace only.</p>
*
* <p>Whitespace is defined by {@link Character#isWhitespace(char)}.</p>
*
* <pre>
* StringUtils.isBlank(undefined) = true
* StringUtils.isBlank(null) = true
* StringUtils.isBlank("") = true
* StringUtils.isBlank(" ") = true
* StringUtils.isBlank("bob") = false
* StringUtils.isBlank(" bob ") = false
* </pre>
*
* @param cs {String} 확인할 문자열
* @return {boolean} <code>true</code> if the cs is undefined, null, empty or whitespace only.
*/
StringUtils.isBlank = function(cs) {
if (cs == undefined || cs == null) {
return true;
}
if (!("string" === typeof(cs) || cs instanceof String)) {
throw new TypeError("Argument cs must be type of String.");
}
let strLen;
if ((strLen = cs.length) == 0) {
return true;
}
// for (var i = 0; i < strLen; i++) {
// if (!StringUtils.isWhitespace(cs.charAt(i))) {
// return false;
// }
// }
if (!StringUtils.isWhitespace(cs)) {
return false;
}
return true;
};
/**
* <pre>
* StringUtils.isNotBlank(undefined) = false
* StringUtils.isNotBlank(null) = false
* StringUtils.isNotBlank("") = false
* StringUtils.isNotBlank(" ") = false
* StringUtils.isNotBlank("bob") = true
* StringUtils.isNotBlank(" bob ") = true
* </pre>
*
* @param cs the CharSequence to check, may be null
* @return <code>true</code> if the CharSequence is
* not empty and not null and not whitespace only
*/
StringUtils.isNotBlank = function(cs) {
return !StringUtils.isBlank(cs);
}
/**
* Apache commons의 StringUtils 클래스에는 없지만, 유용할 듯하여 별도 메서드를 추가함.
* @param cs {String} 확인할 문자열
* @return {boolean} <code>true</code> if the str is undefined, null, empty or whitespace only.
*/
StringUtils.isWhitespace = function(cs) {
if (!("string" === typeof(cs) || cs instanceof String)) {
throw new TypeError("Argument cs must be type of String.");
}
if (/^\s+$/g.test(cs)) {
return true;
}
return false;
};
/**
*
* <pre>
* StringUtils.trim(undefined) = undefined
* StringUtils.trim(null) = null
* StringUtils.trim("") = ""
* StringUtils.trim(" ") = ""
* StringUtils.trim("abc") = "abc"
* StringUtils.trim(" abc ") = "abc"
* </pre>
*
* @param str {String} the String to be trimmed, may be null
* @return {String} the trimmed string, <code>null</code> if null String input
*/
StringUtils.trim = function(str) {
return (str == null || str == undefined) ? str : str.trim();
};
/**
*
* <pre>
* StringUtils.trimToNull(undefined) = null
* StringUtils.trimToNull(null) = null
* StringUtils.trimToNull("") = null
* StringUtils.trimToNull(" ") = null
* StringUtils.trimToNull("abc") = "abc"
* StringUtils.trimToNull(" abc ") = "abc"
* </pre>
*
* @param str {String} the String to be trimmed, may be null
* @return {String} the trimmed String,
* <code>null</code> if only chars <= 32, empty or null String input
*/
StringUtils.trimToNull = function(str) {
const ts = StringUtils.trim(str);
return StringUtils.isEmpty(ts) ? null : ts;
};
/**
*
* <pre>
* StringUtils.trimToEmpty(undefined) = ""
* StringUtils.trimToEmpty(null) = ""
* StringUtils.trimToEmpty("") = ""
* StringUtils.trimToEmpty(" ") = ""
* StringUtils.trimToEmpty("abc") = "abc"
* StringUtils.trimToEmpty(" abc ") = "abc"
* </pre>
*
* @param str {String} the String to be trimmed, may be null
* @return {String} the trimmed String, or an empty String if <code>null</code> input
*/
StringUtils.trimToEmpty = function(str) {
return (str == null || str == undefined) ? "" : str.trim();
};
단위테스트코드
<StringUtilsTest.html>
<!DOCTYPE html>
<html>
<head>
<meta charset="UTF-8">
<title>StringUtilsTest</title>
<link rel="stylesheet" href="https://code.jquery.com/qunit/qunit-2.19.3.css">
</head>
<body>
<div id="qunit"></div>
<div id="qunit-fixture"></div>
<script src="https://code.jquery.com/qunit/qunit-2.19.3.js"></script>
<script src="./StringUtils.js"></script>
<script>
QUnit.module('isEmpty', function() {
let undfnd;
const nll = null;
const empty = "";
const blank = new String(" ");
const longBlank = new String(" ");
const notBlank = "asdf";
QUnit.test('isEmpty', function(assert) {
assert.true(StringUtils.isEmpty(undfnd), 'undefined');
assert.true(StringUtils.isEmpty(nll), 'null');
assert.true(StringUtils.isEmpty(empty), 'empty');
assert.false(StringUtils.isEmpty(blank), 'blank');
assert.false(StringUtils.isEmpty(longBlank), 'long blank');
assert.false(StringUtils.isEmpty(notBlank));
});
});
QUnit.module('isNotEmpty', function() {
let undfnd;
const nll = null;
const empty = "";
const blank = new String(" ");
const longBlank = new String(" ");
const notBlank = "asdf";
QUnit.test('isNotEmpty', function(assert) {
assert.false(StringUtils.isNotEmpty(undfnd), 'undefined');
assert.false(StringUtils.isNotEmpty(nll), 'null');
assert.false(StringUtils.isNotEmpty(empty), 'empty');
assert.true(StringUtils.isNotEmpty(blank), 'blank');
assert.true(StringUtils.isNotEmpty(longBlank), 'long blank');
assert.true(StringUtils.isNotEmpty(notBlank));
});
});
QUnit.module('isBlank', function() {
let undfnd;
const nll = null;
const empty = "";
const blank = new String(" ");
const longBlank = new String(" ");
const notBlank = "asdf";
QUnit.test('isBlank', function(assert) {
assert.true(StringUtils.isBlank(undfnd), 'undefined');
assert.true(StringUtils.isBlank(nll), 'null');
assert.true(StringUtils.isBlank(empty), 'empty');
assert.true(StringUtils.isBlank(blank), 'blank');
assert.true(StringUtils.isBlank(longBlank), 'long blank');
assert.false(StringUtils.isBlank(notBlank));
});
});
QUnit.module('isNotBlank', function() {
let undfnd;
const nll = null;
const empty = "";
const blank = new String(" ");
const longBlank = new String(" ");
const notBlank = "asdf";
QUnit.test('isBlank', function(assert) {
assert.false(StringUtils.isNotBlank(undfnd), 'undefined');
assert.false(StringUtils.isNotBlank(nll), 'null');
assert.false(StringUtils.isNotBlank(empty), 'empty');
assert.false(StringUtils.isNotBlank(blank), 'blank');
assert.false(StringUtils.isNotBlank(longBlank), 'long blank');
assert.true(StringUtils.isNotBlank(notBlank));
});
});
QUnit.module('trim', function() {
QUnit.test('trim', function(assert) {
assert.equal(StringUtils.trim(undefined), undefined);
assert.equal(StringUtils.trim(null), null);
assert.equal(StringUtils.trim(""), "");
assert.equal(StringUtils.trim(" "), "");
assert.equal(StringUtils.trim(" "), "");
assert.equal(StringUtils.trim("asdf"), "asdf");
assert.equal(StringUtils.trim(" asdf "), "asdf");
});
});
QUnit.module('trimToEmpty', function() {
const blank = new String(" ");
const longBlank = new String(" ");
const notBlank = "asdf";
QUnit.test('trimToEmpty', function(assert) {
assert.equal(StringUtils.trimToEmpty(undefined), "");
assert.equal(StringUtils.trimToEmpty(null), "");
assert.equal(StringUtils.trimToEmpty(""), "");
assert.equal(StringUtils.trimToEmpty(" "), "");
assert.equal(StringUtils.trimToEmpty("abc"), "abc");
assert.equal(StringUtils.trimToEmpty(" abc "), "abc");
});
});
</script>
</body>
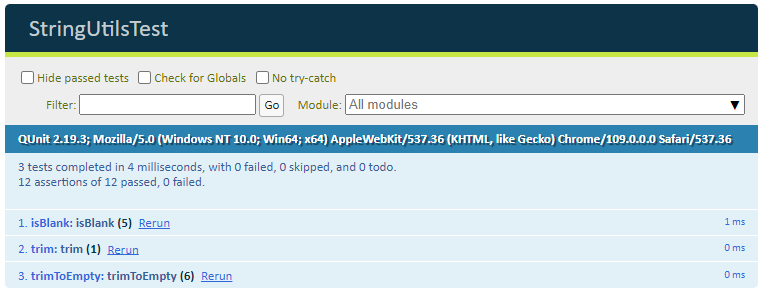
</html>단위테스트결과
반응형
'컴 이것저것 > Java Script' 카테고리의 다른 글
| EasyUI - datagrid 내에 tooltip 띄우기 (0) | 2022.11.15 |
|---|---|
| EasyUI - tabs/tab 현재 선택된 인덱스|id 확인하기 (0) | 2022.11.14 |
| jQuery Ajax -프로그레스바 토글 (0) | 2022.11.11 |
| EasyUI -options : Properties 조회 (0) | 2022.11.10 |
| 정규표현식 시각화 테스트 regex101.com (0) | 2022.07.18 |